

This guide will help you create a CRUD REST API/Service with Spring Boot, JPA, and Hibernate. We will create a JPA Repository for a Student Entity and expose it using a Student Resource.

You will learn
- What is a RESTful Service?
- Basics of designing a REST API.
- How to create a RESTful service offering all CRUD operations?
- How to use Spring Boot, Spring MVC, JPA, and Hibernate to create a RESTful API?
- How to execute different kinds of REST API with Postman?
- What are the differences between GET, POST, PUT, and DELETE request methods?
Resources Overview
In this guide, we will create a student resource exposing three services using proper URIs and HTTP methods:
- Retrieve all students:
@GetMapping("/students") - Get details of a specific student:
@GetMapping("/students/{id}") - Delete a student:
@DeleteMapping("/students/{id}") - Create a new student:
@PostMapping("/students") - Update student details with
@PutMapping("/students/{id}")
Project Code Structure
The following screenshot shows the structure of the project we will create.

A few details
SpringBoot2RestServiceApplication.java- The Spring Boot Application class that Spring Initializer generates.This class acts as the launching point for applications.pom.xml-Contains all the dependencies needed to build this project. We will use Spring Boot Starter AOP.Student.java- Student JPA EntityStudentRepository.java-Student JPA Repository This was created using Spring Data JpaRepository.StudentResource.java-Spring Rest Controller exposing all services on the student resource.data.sql: initial data for the student table. Spring Boot would execute this script after the tables are created from the entities.
You will require the following tools:
- Maven 3.0+ is your build tool
- Your favorite IDE. We use Eclipse.
- JDK 17
A Complete Maven Project With Code Examples
Our Github repository has all the code examples - https://github.com/in28minutes/spring-boot-examples/tree/master/spring-boot-2-rest-service-basic
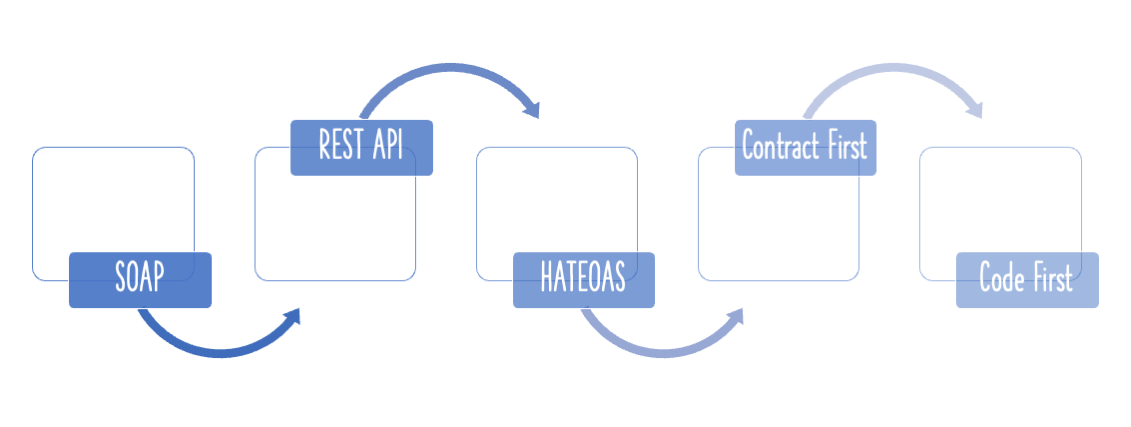
Types of Web Services
Not exactly types, but rather a broad classification
- SOAP
- REST
These are not really mutually exclusive. Some SOAP services can actually be RESTful.
REST
First of all, REST does not define a standard message exchange format. You can build REST services with both XML and JSON. However, JSON is a more popular format than REST.
So, if it does not define a standard message exchange format, what is REST then?
REST is a style of software architecture for distributed hypermedia systems.
REST stands for REpresentational State Transfer. The definitions of REST can be vague. So let’s understand the important concepts.
A key abstraction in REST is a resource. There is no restriction on what can be a resource. A todo is a resource. A person on Facebook is a resource.
A resource has a URI (Uniform Resource Identifier):
- /user/Ranga/todos/1
- /person/Ranga
A resource will have representation.
- XML
- HTML
- JSON
A resource will have a state. The representation of a resource should capture its current state.
When a resource is requested, we provide a representation of the resource.
REST and HTTP
REST is built on top of HTTP (Hypertext Transfer Protocol). HTTP is the language of the web.
HTTP has a few important verbs.
- POST: Create a new resource
- GET: Read an article
- PUT: Update an existing resource
- DELETE: Delete a resource
HTTP also defines standard response codes.
- 200 - SUCCESS
- 404 - RESOURCE NOT FOUND
- 400 - BAD REQUEST
- 201 - CREATED
- 401 - UNAUTHORIZED
- 415 - UNSUPPORTED TYPE - Representation not supported for the resource
- 500 - SERVER ERROR
Restful Service Constraints
- Client-Server: There should be a service producer and a service consumer.
- The interface (URL) is uniform and exposes resources. The interface uses nouns (not actions).
- The service is stateless. Even if the service is called 10 times, the result must be the same.
- The service response should be cacheable. HTTP cache, for example.
- Services should assume a layered architecture. The client should not assume direct connection to the server-it might be getting info from a middle layer-cache.
Creating RESTful APIs
Following are the important things to consider when designing RESTful API’s:
- While designing any API, the most important thing is to think about the api consumer, i.e., the client who is going to use the service. What are his needs? Does the service make sense to him? Does the request and response format make sense to him?
- For the rest, we think nouns (resources) and not verbs (not actions). So, URIs should represent resources. URIs should be hierarchical and as self-descriptive as possible. Prefer plurals.
- Always use HTTP methods.
- GET : You should not update anything. should be idempotent (results the same in multiple calls). 200 (OK) + 404 (NOT FOUND) +400 (BAD REQUEST) are possible return codes.
- POST : Should create new resource. Ideally, return JSON with a link to the newly created resource. same return codes as possible. In addition, return code 201 (CREATED) is possible.
- PUT : Update an existing resource. update client details. Possible Return Codes : 200(OK)
- DELETE : Used to delete a resource.
When do you use JPA?
- SQL Database
- Static Domain Model
- Mostly CRUD
- Mostly simple queries/mappings
Bootstrapping with Spring Initializr
Creating a REST service with Spring Initializr is a cake walk. We will use Spring Web MVC as our web framework.
Spring Initializr http://start.spring.io/ is great tool to bootstrap your Spring Boot projects.

As shown in the image above, following steps have to be done
- Launch Spring Initializr and choose the following
- Choose
com.in28minutes.springboot.rest.exampleas Group - Choose
spring-boot-2-rest-service-basicas Artifact - Choose following dependencies
- Web
- JPA
- H2
- DevTools
- Choose
- Click Generate.
- Import the project into Eclipse. File > Import > Existing Maven Project
Do not forget to add JPA and H2 as dependencies.
Make Your Very First JPA Entity
The first step is to create a JPA Entity. Let’s create a simple student entity with a primary key id.
@Entity
public class Student {

	@Id
	@GeneratedValue
	private Long id;

	private String name;

	private String passportNumber;
Important things to note:
@Entity: Specifies that the class is an entity. This annotation is applied to the entity class.@Id: Specifies the primary key of an entity.@GeneratedValue: It provides for the specification of generation strategies for the values of primary keys.public Student(): JPA-friendly default function Object() { [native code] }
When the application reloads, you can launch the H2 console at http://localhost:8080/h2-console.
You will see that a new table called ‘student’ is created in H2 Console.
How did the Student table get created?
Spring Boot Auto Configuration detects that we are using an in-memory database H2. It autoconfigures the property to create the database tables based on the entities.
Let’s now populate some data into the student table.
/src/main/resources/data.sql
insert into student values(10001,'Ranga', 'E1234567');

insert into student values(10002,'Ravi', 'A1234568');
When the application reloads, you will see the following statements in the log, indicating that the sql files are picked up.
Executing SQL script from URL [file:/in28Minutes/git/spring-boot-examples/spring-boot-2-jdbc-with-h2/target/classes/data.sql]
After app reload, when you login to H2 Console (http://localhost:8080/h2-console), you can see that the student table is created and the data is populated.
Make a JPA Repository class that reads students from a database.
/src/main/java/com/in28minutes/springboot/jpa/hibernate/h2/example/student/StudentRepository.java
We created a simple interface for StudentRepository, extending JpaRepository.
@Repository
public interface StudentRepository extends JpaRepository<Student, Long>{
Notes
- We will talk about all the methods in the JpaRepository a little later.
public interface StudentRepository extends JpaRepository<Student, Long>- We are extending JpaRepository using two generics—Student and Long. Student is the entity that is being managed and the primary key of Student is Long.
JpaRepository
JpaRepository (defined in Spring Data JPA) is the JPA-specific repository interface.
public interface JpaRepository<T, ID extends Serializable>
		extends PagingAndSortingRepository<T, ID>, QueryByExampleExecutor<T> {
JpaRepositoryextendsPagingAndSortingRepository, which in turn extends theCrudRepositoryinterface. So, JpaRepository inherits all the methods from the two interfaces shown below.
PagingAndSortingRepository
public abstract interface PagingAndSortingRepository extends CrudRepository {

  public abstract Iterable findAll(Sort arg0);

  public abstract Page findAll(Pageable arg0);

}
CrudRepository
public interface CrudRepository<T, ID extends Serializable>
    extends Repository<T, ID> {

    <S extends T> S save(S entity);

    T findOne(ID primaryKey);

    Iterable<T> findAll();

    Long count();

    void delete(T entity);

    boolean exists(ID primaryKey);

    // … more functionality omitted.
}
Exposing resources using StudentResource
Let’s start with setting up the StudentResource class and then move into creating methods to handle different kinds of request methods to the Student Resource.
Setting up Student Resource
@RestController
public class StudentResource {

	@Autowired
	private StudentRepository studentRepository;
Notes
@RestController: Combination of @Controller and @ResponseBody. Beans returned are converted to and from JSON or XML.@Autowired private StudentRepository studentRepository: Autowire the StudentRepository so that we can retrieve and save data to the database.
Getting Access to Resources for Students
Let’s create the method to expose the details of all students.
@GetMapping("/students")
public List<Student> retrieveAllStudents() {
	return studentRepository.findAll();
}
The below picture shows how we can execute a Get Request Method on a resource using Postman, my favourite tool to run rest services.

- URL - http://localhost:8080/students
- Request Method - GET
Response
[
  {
    "id": 10001,
    "name": "Ranga",
    "passportNumber": "E1234567"
  },
  {
    "id": 10002,
    "name": "Ravi",
    "passportNumber": "A1234568"
  }
]
Let’s create a method to expose the details of a specific student.
@GetMapping("/students/{id}")
public Student retrieveStudent(@PathVariable long id) {
	Optional<Student> student = studentRepository.findById(id);

	if (student.isEmpty())
		throw new StudentNotFoundException("id-" + id);

	return student.get();
}
Let’s execute another GET request
- URL - http://localhost:8080/students/10002
- Request Method - GET
Response
{
  "id": 10002,
  "name": "Ravi",
  "passportNumber": "A1234568"
}
Showcase the DELETE Method on Student Resources
The delete method is simple. All you have to do is to call studentRepository.deleteById(id).
@DeleteMapping("/students/{id}")
public void deleteStudent(@PathVariable long id) {
	studentRepository.deleteById(id);
}
The below picture shows how we can execute a DELETE Request method on a resource from Postman, my favourite tool to run rest services.

- URL - http://localhost:8080/students/10002
- Request Method - DELETE
Request - Empty Body Response with status 200 - Successful
Expose the POST method to create a new student
The POST method is simple. All you have to do is to call studentRepository.save(student). Note that we are using @RequestBody to map the student details from request to bean. We are also returning a ResponseEntity with a header containing the URL of the created resource.
@PostMapping("/students")
public ResponseEntity<Object> createStudent(@RequestBody Student student) {
	Student savedStudent = studentRepository.save(student);

	URI location = ServletUriComponentsBuilder.fromCurrentRequest().path("/{id}")
			.buildAndExpand(savedStudent.getId()).toUri();

	return ResponseEntity.created(location).build();

}
The below picture shows how we can execute a POST Request method on a resource from Postman, my favourite tool to run rest services.

- URL - http://localhost:8080/students
- Request Method - POST
Request
  {
    "name": "Tom",
    "passportNumber": "Z1234567"
  }
Response
- Status 201 - CREATED
- Header Location →http://localhost:8080/students/2
To update existing students, use the PUT Method.
Before updating the student, we check if the student exists. If the student does not exist, we return a not found statur. Otherwise, we save the student details using studentRepository.save method.
@PutMapping("/students/{id}")
public ResponseEntity<Object> updateStudent(@RequestBody Student student, @PathVariable long id) {

	Optional<Student> studentOptional = studentRepository.findById(id);

	if (studentOptional.isEmpty())
		return ResponseEntity.notFound().build();

	student.setId(id);

	studentRepository.save(student);

	return ResponseEntity.noContent().build();
}
The below picture shows how we can execute a PUT Request method on a resource from Postman, my favourite tool to run rest services.

- URL → http://localhost:8080/students/10002
- Request
- Method → PUT
Request
{
	"name": "Tom",
	"passportNumber": "Z1234567"
}
Response with status 200 - Successful
Remember that you can check the updates in the database using H2 Console
http://localhost:8080/h2-consoleafter each of the requests.
Example of Complete Code
Github repository has all the code examples - https://github.com/in28minutes/spring-boot-examples/tree/master/spring-boot-2-rest-service-basic
Just Released