

This guide helps you setup Spring Security with Basic and JWT authentication with a full stack application using React as Frontend framework and Spring Boot as the backend REST API. We will be using JavaScript as the frontend language and Java as the backend language.

You will learn
- How do you use React as a Frontend Framework?
- How do you use Spring to create Backend REST Service API?
- How do you setup Basic Authentication with Spring Boot?
- How do you use Spring Security with Spring Boot?
- How do you use JWT Security with Spring Boot?
- How do you verify Basic Authentication at user login calling a REST API with React?
- How do you make secured REST API calls from React frontend?
- How do you use sessionStorage to track tokens in the React frontend application?
Step 0: Get an overview of the Full Stack Application
Understanding Basic Features of the Application
Following screenshot shows the application we would like to build:
We would request user for authentication credentials on the login page.

Once user is authenticated using Basic Authentication or JWT Authentication, we show the course details page.
User would be able to logout by click the logout button.
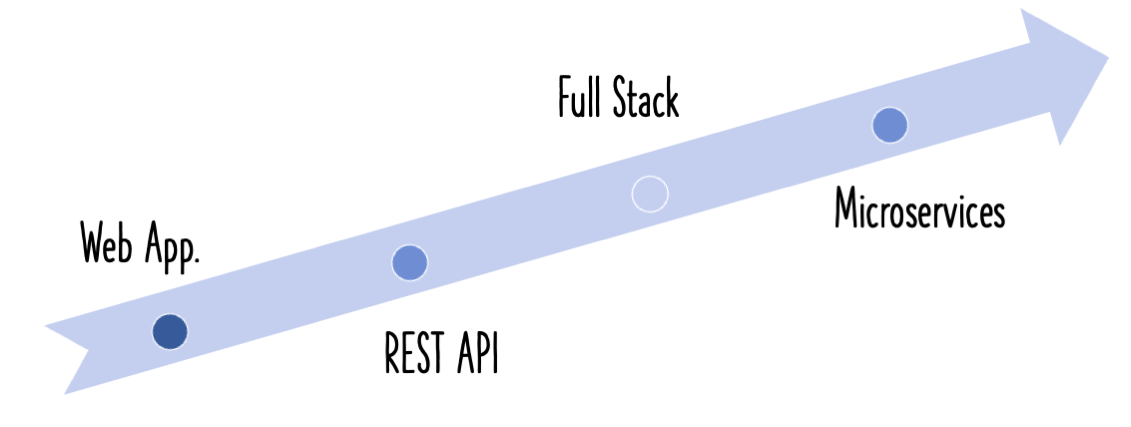
Understanding Full Stack Architecture
Following Screenshot shows the architecture of the application we would create:
Important points to note:
- REST API is exposed using Spring Boot
- REST API is secured using Spring Security. We discuss two approaches - Basic Auth and JWT.
- REST API is consumed from React Frontend to present the UI
- The Database, in this example, is a hardcoded in-memory static list.
You can find more details about Full Stack Architecture here - Full Stack Application Architecture - Spring Boot and React

Getting an overview of Spring Boot and Spring Security REST API Resources
In this guide, we will create these services:
@GetMapping("/instructors/{username}/courses"): Get Request Method exposing the list of courses taught by a specific instructor
Services for Basic Authentication
@GetMapping(path = "/basicauth"): Get Request Method for Basic Authentication. You can send a request to this method to see if the user credentials entered on the login page are valid.
Services for JWT Authentication
- @RequestMapping(value = “/authentication”, method = RequestMethod.POST) - Resource to get a JWT token providing user credentials.
- @RequestMapping(value = “/refresh”, method = RequestMethod.GET) - Resource to refresh a JWT Token before it expires.
Downloading the Complete Maven Project With Code Examples
In this example, the BACKEND Spring Boot projects are different for JWT Authentication and Basic Authentication
FRONTEND React projects are almost the same exception for a minor change. The Frontend project can be used from Project. For JWT, a minor change needs to be done which is explained at Project
Complete Code Example shows all the code.
Our Github repository has all the code examples - Github Repo
Understanding Spring Boot REST API Project Structure
Following screenshot shows the structure of the Spring Boot project we create for Basic Authentication.

Following screenshot shows the structure of the Spring Boot project we create for JWT Authentication.

A few details:
Common Files
CourseResource.java- Rest Resource exposing all the service methods discussed above.Course.java, CoursesHardcodedService.java- Business Logic for the application. CoursesHardcodedService exposes a few methods we would invoke from our Rest Resource.SpringBootFullStackBasicAuthLoginLogoutApplication.java- Launcher for the Spring Boot Application. To run the application, launch this file as Java Application.pom.xml- Contains all the dependencies needed to build this project. We use Spring Boot Starter Web and Spring Boot DevTools.
Basic Authentication Files
AuthenticationBean.java- Simple bean which will be used to send a response for the basic authentication request.BasicAuthenticationController.java- Provides the implementation for@GetMapping(path = "/basicauth")to check if the basic authentication credential are validSpringSecurityConfigurationBasicAuth.java- Contains Spring Configuration to enable Basic Authentication.
JWT Authentication Files
JwtAuthenticationRestController.java- Exposes all the URLs related to JWT Authentication.JwtUserDetails.java- Implementation ofUserDetailsinterface providing user details.JwtInMemoryUserDetailsService.java- Provides an in memory implementation ofUserDetailsServicestoring the user credentials.JwtTokenAuthorizationOncePerRequestFilter.java-JwtTokenRequest.java- Represents the structure of request to get a JWT Token.JwtTokenResponse.java- Represnets to structure of response containing the JWT Token.JwtTokenUtil.java- Provide JWT Utilities to encrypt and decrypt JWT tokens.JwtUnAuthorizedResponseAuthenticationEntryPoint.java- Used when a valid token is not provided with a REST API callJWTWebSecurityConfig.java- Customizes Spring Security for JWT Authentication Needs by extendingWebSecurityConfigurerAdapterAuthenticationException.java- Use to throw invalid credentials or token exception
Understanding React Frontend Project Structure
Following screenshot shows the structure of the React project we create.

Quick Tip: You can get a high-level overview of all files in the React Project Structure watching this video React Project Structure
A few details:
InstructorApp.jsx: React Component representing the high-level structure of the application. Routing is defined in this file.ListCoursesComponent.jsx- React Component for listing all the courses for an instructor.CourseDataService.js- Service using axios framework to make the Backend REST API Calls.LoginComponent.jsx- Login Component representing the login screen.LogoutComponent.jsx- Logout Component handles the click of Logout button at the top right corner of the screenMenuComponent.jsx- Handles display of the top menu.AuthenticationService.jsx- Service handling all details related to JWT and Basic Authentication.AuthenticatedRoute.jsx- We would want certain routes like /courses to be accessed only by authenticated users.AuthenticationRoutehelps us implement this.
Understanding the tools you need to build this project
- Maven 3.0+ for building Spring Boot API Project
- npm, webpack for building frontend
- Your favorite IDE. We use Eclipse for Java and Visual Studio Code for Frontend - JavaScript, TypeScript, Angular and React.
- JDK 1.8+
- Node v8+
- Embedded Tomcat, built into Spring Boot Starter Web
Installing Node Js (npm) & Visual Studio Code
- Click to see video Playlist
- Step 01 - Installing NodeJs and NPM - Node Package Manager
- Step 02 - Quick Introduction to NPM
- Step 03 - Installing Visual Studio Code - Front End JavaScript Editor
Installing Java, Eclipse & Embedded Maven
- Click to see video Playlist
- 0 - Overview - Installation Java, Eclipse and Maven
- 1 - Installing Java JDK
- 2 - Installing Eclipse IDE
- 3 - Using Embedded Maven in Eclipse
- 4 - Troubleshooting Java, Eclipse and Maven
Steps 1, 2 and 3 - Creating A Simple Full Stack application with React and Spring Boot - Step By Step Approach
We will use a step by step approach to creating the full stack application
- Create a Spring Boot Application with Spring Boot Initializr
- Create a React application using Create React App
- Create the Retrieve Courses REST API and Enhance the React Front end to retrieve the courses using the axios framework
You can get an introduction to REST down here - Introduction to REST API
Above steps are similar to the full stack CRUD application guide here - Creating Spring Boot and React CRUD Full Stack Application with Maven
You can follow Step 1, 2 and 3 from the above guide.
When you launch the React app in the browser, it will appear as shown below:

Step 4: Adding Basic Authentication to Backend
All that you need to do is to add Spring Boot Starter Security to your pom.xml
You would see that the Basic Authentication is now enabled.
If you restart the backend application, you would see the basic authentication password is printed into the console
Using generated security password: 5434c56e-05bc-4b33-b54d-cf3a7c358f5b
If you try to launch the url http://localhost:8080/instructors/in28minutes/courses, you will be asked for credentials. The user id as user and password is shown above.
Instead of using Random Password, we can configure our own user credentials in application.properties.
spring.security.user.name=in28minutes
spring.security.user.password=dummy
When you launch the url http://localhost:8080/instructors/in28minutes/courses in a new browser, you can use the username and password specified above.
If you go the frontend and refresh the page, you would see that the page does not load as expected.
Step 5: Updating Frontend React Application to use hardcoded Basic Authentication
Let’s now update the react front end to use basic authentication credentials to call the course listing api.
You can see the complete listing of CourseDataService below:
import axios from 'axios'

const INSTRUCTOR = 'in28minutes'
const PASSWORD = 'dummy'
const COURSE_API_URL = 'http://localhost:8080'
const INSTRUCTOR_API_URL = `${COURSE_API_URL}/instructors/${INSTRUCTOR}`

class CourseDataService {

    retrieveAllCourses(name) {
        console.log('executed service')
        return axios.get(`${INSTRUCTOR_API_URL}/courses`,
            { headers: { authorization: 'Basic ' + window.btoa(INSTRUCTOR + ":" + PASSWORD) } }
        );
    }
}

export default new CourseDataService()
If you refresh the course listing page, you should see another error.
Access to XMLHttpRequest at 'http://localhost:8080/basicauth' from origin 'http://localhost:3000' has been blocked by CORS policy: Response to preflight request doesn't pass access control check: It does not have HTTP ok status.
Step 5: Updating Spring Security to allow Preflight OPTION Requests
Preflight request failed - what does that mean?
When you are using authentication, before executing the actual request , browser sends something called an OPTION request.
If you go to the network tab, you would see the request and responses with following headers
Request URL: http://localhost:8080/instructors/in28minutes/courses
Request Method: OPTIONS
Status Code: 401
Remote Address: [::1]:8080
Referrer Policy: no-referrer-when-downgrade
We can configure Spring Security to enable all OPTIONS requests. Following snippets show the spring security configuration needed.
@Configuration
@EnableWebSecurity
public class SpringSecurityConfigurationBasicAuth extends WebSecurityConfigurerAdapter{

    @Override
    protected void configure(HttpSecurity http) throws Exception {
        http
        .csrf().disable()
        .authorizeRequests()
        .antMatchers(HttpMethod.OPTIONS,"/**").permitAll()
                .anyRequest().authenticated()
                .and()
            //.formLogin().and()
            .httpBasic();
    }
}
When you launch the React app in the browser, it will appear as shown below:
If you look at the request to http://localhost:8080/instructors/in28minutes/courses in the browser, you would see the following headers:
Accept: application/json, text/plain, */*
authorization: Basic aW4yOG1pbnV0ZXM6ZHVtbXk=
You would also see a successful response.
Congratulations on your first authenticated API call!
Is this the end of story? Nope. Ideally, we should have a Login Page to get the credentials from the user, authenticate the credentials and use those details for subsequent REST API calls.
Let’s focus on this in the next steps.
Step 06: Create an API for basic authentication
When we create a login page, we need to call an authentication url to validate the user credentials. You don’t want to use some random url. Let’s create a REST API.
We create a simple url “/basicauth” returning an AuthenticationBean of successful.
@CrossOrigin(origins={ "http://localhost:3000", "http://localhost:4200" })
@RestController
public class BasicAuthenticationController {

    @GetMapping(path = "/basicauth")
    public AuthenticationBean authenticate() {
        //throw new RuntimeException("Some Error has Happened! Contact Support at ***-***");
        return new AuthenticationBean("You are authenticated");
    }
}
public class AuthenticationBean {

    private String message;

    //constructors, getters

}
There is no authentication logic in
authenticate()method. Why? Because, we already configured spring security, it auto protects all URLs with basic authentication. An user would be able to get to/basicauthonly if they provide the right credentials.
Step 07: Create a Login Component with hardcoded authentication
We will create a Login Component with hardcoded authentication.
import React, { Component } from 'react'
import AuthenticationService from '../service/AuthenticationService';

class LoginComponent extends Component {

    constructor(props) {
        super(props)

        this.state = {
            username: 'in28minutes',
            password: '',
            hasLoginFailed: false,
            showSuccessMessage: false
        }

        this.handleChange = this.handleChange.bind(this)
        this.loginClicked = this.loginClicked.bind(this)
    }

    handleChange(event) {
        this.setState(
            {
                [event.target.name]
                    : event.target.value
            }
        )
    }

    loginClicked() {
        if(this.state.username==='in28minutes' && this.state.password==='dummy'){
            AuthenticationService.registerSuccessfulLogin(this.state.username,this.state.password)
            this.setState({showSuccessMessage:true})
            this.setState({hasLoginFailed:false})
        }
        else {
             this.setState({showSuccessMessage:false})
             this.setState({hasLoginFailed:true})
        }
    }

    render() {
        return (
            <div>
                <h1>Login</h1>
                <div className="container">
                    {this.state.hasLoginFailed && <div className="alert alert-warning">Invalid Credentials</div>}
                    {this.state.showSuccessMessage && <div>Login Sucessful</div>}
                    User Name: <input type="text" name="username" value={this.state.username} onChange={this.handleChange} />
                    Password: <input type="password" name="password" value={this.state.password} onChange={this.handleChange} />
                    <button className="btn btn-success" onClick={this.loginClicked}>Login</button>
                </div>
            </div>
        )
    }
}

export default LoginComponent
Let’s look at above component in depth:
We are using state to represent user credentials entered by user and also to contain messages for showing success and failed authentication messages.
        this.state = {
            username: 'in28minutes',
            password: '',
            hasLoginFailed: false,
            showSuccessMessage: false
        }
We are creating a simple form with username and password which is tied to the state:
  User Name: <input type="text" name="username" value={this.state.username} onChange={this.handleChange} />
  Password: <input type="password" name="password" value={this.state.password} onChange={this.handleChange} />
  <button className="btn btn-success" onClick={this.loginClicked}>Login</button>
We are using events to update state as soon as values in the text fields change.
handleChange(event) {
    this.setState(
        {
            [event.target.name]
                : event.target.value
        }
    )
}
loginClicked is called when user clicks Login button. We add a bit of hardcoded validation for now.
loginClicked() {
    if(this.state.username==='in28minutes' && this.state.password==='dummy'){
        this.setState({showSuccessMessage:true})
        this.setState({hasLoginFailed:false})
    }
    else {
         this.setState({showSuccessMessage:false})
         this.setState({hasLoginFailed:true})
    }
}
If you update the InstructorApp to show the LoginComponent, you can play with the login component.
class InstructorApp extends Component {
    render() {
        return (<>
              <h1>Instructor Application</h1>
              <LoginComponent/>
            </>
        )
    }
}

export default InstructorApp
Step 08 - Adding Routing to React Application
When user click login and user is successfully authenticated, we would want to see the course listing page. We would want to route from LoginComponent to ListCoursesComponent. We would need to implement routing.
In Step 03, we added a framework to support routing - react-router-dom
When the user clicks the update course button on the course listing page, we would want to route to the course page. How do we do it? That’s where Routing comes into the picture.
Let’s update InstructorApp to define the routes.
/src/component/InstructorApp.jsx
class InstructorApp extends Component {


    render() {
        return (
            <>
                <Router>
                    <>
                        <MenuComponent />
                        <Switch>
                            <Route path="/" exact component={LoginComponent} />
                            <Route path="/login" exact component={LoginComponent} />
                            <AuthenticatedRoute path="/courses" exact component={ListCoursesComponent} />
                        </Switch>
                    </>
                </Router>
            </>
        )
    }
}
We are defining a Router around all the components and configuring paths to each of them.
- http://localhost:3000/ and http://localhost:3000/login takes you to login page
- http://localhost:3000/courses takes you to course listing page
Now that we have the routes defined, we can route from LoginComponent to ListCoursesComponent on successful login.
loginClicked() {
    if(this.state.username==='in28minutes' && this.state.password==='dummy'){
        this.props.history.push(`/courses`)
        //this.setState({showSuccessMessage:true})
        //this.setState({hasLoginFailed:false})
    }
    else {
         this.setState({showSuccessMessage:false})
         this.setState({hasLoginFailed:true})
    }
}
You would see that we are now able to route from login to course listing page if we enter the right credentials.
Step 09 - Remove Authentication hardcoding and call the REST API for Basic Authentication
Do you like hardcoded authentication? Let’s fix it.
if(this.state.username==='in28minutes' && this.state.password==='dummy'){
Let’s create AuthenticationService to call the basic authentication url.
class AuthenticationService {

    executeBasicAuthenticationService(username, password) {
        return axios.get(`${API_URL}/basicauth`,
            { headers: { authorization: this.createBasicAuthToken(username, password) } })
    }

    createBasicAuthToken(username, password) {
        return 'Basic ' + window.btoa(username + ":" + password)
    }
}
Let’s update the LoginComponent to use the service.
    loginClicked() {
        //in28minutes,dummy
        // if(this.state.username==='in28minutes' && this.state.password==='dummy'){
        //     AuthenticationService.registerSuccessfulLogin(this.state.username,this.state.password)
        //     this.props.history.push(`/courses`)
        //     //this.setState({showSuccessMessage:true})
        //     //this.setState({hasLoginFailed:false})
        // }
        // else {
        //     this.setState({showSuccessMessage:false})
        //     this.setState({hasLoginFailed:true})
        // }

        AuthenticationService
            .executeBasicAuthenticationService(this.state.username, this.state.password)
            .then(() => {
                this.props.history.push(`/courses`)
            }).catch(() => {
                this.setState({ showSuccessMessage: false })
                this.setState({ hasLoginFailed: true })
            })
      }
When we call REST API we need to use promises to define success (then) and failure scenarios (catch).
Step 10 - Remove Hardcoded Header from Course Listing REST API call
Earlier we hardcoded the basic authentication header in the REST API call. This is not ideal.
        return axios.get(`${INSTRUCTOR_API_URL}/courses`,
            { headers: { authorization: 'Basic ' + window.btoa(INSTRUCTOR + ":" + PASSWORD) } }
When we make any REST API call, we would want to automatically add the authorization header that we added for the authentication api call.
How do we do that?
When user login is successful, we can setup an axios header to added a authorization header on every subsequent API call. Does that sound like a plan?
AuthenticationService.registerSuccessfulLogin(this.state.username, this.state.password)
Let’s add these methods to AuthenticationService:
    registerSuccessfulLogin(username, password) {
        //let basicAuthHeader = 'Basic ' +  window.btoa(username + ":" + password)
        //console.log('registerSuccessfulLogin')
        sessionStorage.setItem(USER_NAME_SESSION_ATTRIBUTE_NAME, username)
        this.setupAxiosInterceptors(this.createBasicAuthToken(username, password))
    }

    setupAxiosInterceptors(token) {
        axios.interceptors.request.use(
            (config) => {
                if (this.isUserLoggedIn()) {
                    config.headers.authorization = token
                }
                return config
            }
        )
    }
setupAxiosInterceptors sets up the axios interceptor to add the authorization token on every subsequent REST API call. config.headers.authorization = token
Let’s call it on successful login in loginClicked in LoginComponent:
AuthenticationService
    .executeBasicAuthenticationService(this.state.username, this.state.password)
    .then(() => {
        AuthenticationService.registerSuccessfulLogin(this.state.username, this.state.password)
        this.props.history.push(`/courses`)
    }).catch(() => {
        this.setState({ showSuccessMessage: false })
        this.setState({ hasLoginFailed: true })
    })
Let’s also remove the hardcode authorization from CourseDataService
class CourseDataService {

    retrieveAllCourses(name) {
        //console.log('executed service')
        return axios.get(`${INSTRUCTOR_API_URL}/courses`,
            //{ headers: { authorization: 'Basic ' + window.btoa(INSTRUCTOR + ":" + PASSWORD) } }
        );
    }
}
Cool! If you run the app now, you should be fine.
Congratulations on implementing Basic Authentication
You can look up the MenuComponent, LogoutComponent to add features like Menu and Logout.
Step 11 - Implementing JWT Authentication for Backend
JWT stands for JavaScript Web Token.
You can refer https://jwt.io/ for a quick introduction to JWT.
Basic Authentication Header does not have an expiry time and therefore a hacker get his hand on a basic authentication header, he can use it until the password is changed.
Instead of passing userid and password, in JWT, we pass a token with every request.
When a user logs in, we use his credential to get a JWT token. In all subsequent rest api requests, we use the token. Since the token has an expiration time, it offers better security than Basic Authentication.
Implementing JWT Authentication for Spring Boot is complex. Following are some of the important components involved.
JWT Authentication Files
JwtAuthenticationRestController.java- Exposes all the URLs related to JWT Authentication.JwtUserDetails.java- Implementation ofUserDetailsinterface providing user details.JwtInMemoryUserDetailsService.java- Provides an in memory implementation ofUserDetailsServicestoring the user credentials.JwtTokenAuthorizationOncePerRequestFilter.java-JwtTokenRequest.java- Represents the structure of request to get a JWT Token.JwtTokenResponse.java- Represnets to structure of response containing the JWT Token.JwtTokenUtil.java- Provide JWT Utilities to encrypt and decrypt JWT tokens.JwtUnAuthorizedResponseAuthenticationEntryPoint.java- Used when a valid token is not provided with a REST API callJWTWebSecurityConfig.java- Customizes Spring Security for JWT Authentication Needs by extendingWebSecurityConfigurerAdapterAuthenticationException.java- Use to throw invalid credentials or token exception
I would recommend to check out the code for these components in the Complete Code Example at the end of this article.
For setting up the JWT Backend Spring Boot API , I would recommend to download the project at this URL - Github Repo. Once you import the project, you can launch
SpringBootFullStackJwtAuthLoginLogoutApplicationas a Java Application.
JWT Authentication URLs
You can send a POST request to http://localhost:8080/authenticate with the request body containing the credentials.
{
  "username":"in28minutes",
  "password":"dummy"
}
The Response contains the JWT token
{
"token": "eyJhbGciOiJIUzUxMiJ9.eyJzdWIiOiJyYW5nYSIsImV4cCI6MTU0MjQ3MjA3NCwiaWF0IjoxNTQxODY3Mjc0fQ.kD6UJQyxjSPMzAhoTJRr-Z5UL-FfgsyxbdseWQvk0fLi7eVXAKhBkWfj06SwH43sY_ZWBEeLuxaE09szTboefw"
}
We can use this token for subsequent API calls.
To refresh the token, we can send a GET request to http://localhost:8080/authenticate with the token in the header. You would get a new token in the response
Step 12 - Updating Front End Code to Use JWT
Updating front end code to use JWT is very simple.
We will create a method to call the JWT authenticate url with POST method in AuthenticationService.
  executeJwtAuthenticationService(username, password) {
      console.log(username);
      return axios.post(`${API_URL}/authenticate`, {
          username,
          password
      })
  }
We will create another method in AuthenticationService to register successful login for JWT. This will setup the token in sessionStorage and also setup the axios interceptors for subsequent api calls.
registerSuccessfulLoginForJwt(username, token) {
    sessionStorage.setItem(USER_NAME_SESSION_ATTRIBUTE_NAME, username)
    this.setupAxiosInterceptors(this.createJWTToken(token))
}

createJWTToken(token) {
    return 'Bearer ' + token
}
We can now comment out the Basic Authentication call and call JWT authentication service in LoginComponent.
AuthenticationService
    .executeJwtAuthenticationService(this.state.username, this.state.password)
    .then((response) => {
        AuthenticationService.registerSuccessfulLoginForJwt(this.state.username, response.data.token)
        this.props.history.push(`/courses`)
    }).catch(() => {
        this.setState({ showSuccessMessage: false })
        this.setState({ hasLoginFailed: true })
    })
When you login, you should the REST API request to /authenticate returning with a response containing JWT token. This JWT token is used in all subsequent REST API calls.
Downloading the Complete Maven Project With Code Examples
In this example, the BACKEND Spring Boot projects are different for JWT Authentication and Basic Authentication
FRONTEND React projects are almost the same exception for a minor change. The Frontend project can be used from Project. For JWT, a minor change needs to be done which is explained at Project
Complete Code Example shows all the code.
Our Github repository has all the code examples - Github Repo
Just Released