
This post will show you how to document your RESTful services using Swagger and Spring Boot. We’ll look at how to expose automatic swagger documentation from your app. We will also use swagger annotations to add documentation to the REST API.

You will learn
- What is the need for documenting your RESTful services?
- How do you document RESTful web services?
- Why Swagger?
- How can you use Swagger UI?
- How do you automate generation of Swagger Documentation from RESTful Web Services?
- How do you add custom information to Swagger Documentation generated from RESTful Web Services?
- What is Swagger-UI?
Project Code Structure
Following screen shot shows the structure of the project we will create.

A few details:
- SpringBoot2RestServiceApplication.java - The Spring Boot Application class generated with Spring Initializer. This class acts as the launching point for application.
pom.xml- Contains all the dependencies needed to build this project. We will use Spring Boot Starter AOP.Student.java- Student JPA Entity- StudentRepository.java - Student JPA Repository. This is created using Spring Data JpaRepository.
- StudentResource.java - Spring Rest Controller exposing all services on the student resource.
- data.sql - Initial data for the student table. Spring Boot would execute this script after the tables are created from the entities.
- ApiDocumentationConfig.java - Meta Information about the API that will included in the documentation.
- SwaggerConfig.java - Contains the Swagger Configuration for generating documentation
Tools you will need
- Maven 3.0+ is your build tool
- Your favorite IDE. We use Eclipse or IntelliJ.
- JDK 17
Complete Maven Project With Code Examples
Our Github repository has all the code examples - https://github.com/in28minutes/spring-boot-examples/tree/master/spring-boot-2-rest-service-with-swagger
Why should we describe your RESTful API?
The most important design principle for RESTful Services is
Think about consumer of the API.
How does the consumer know
- What is format of the request?
- What content types your API supports?
- What is the structure of the response?
- Do you use HATEOAS?
- How to test your API?
- What kind of security mechanism you use?
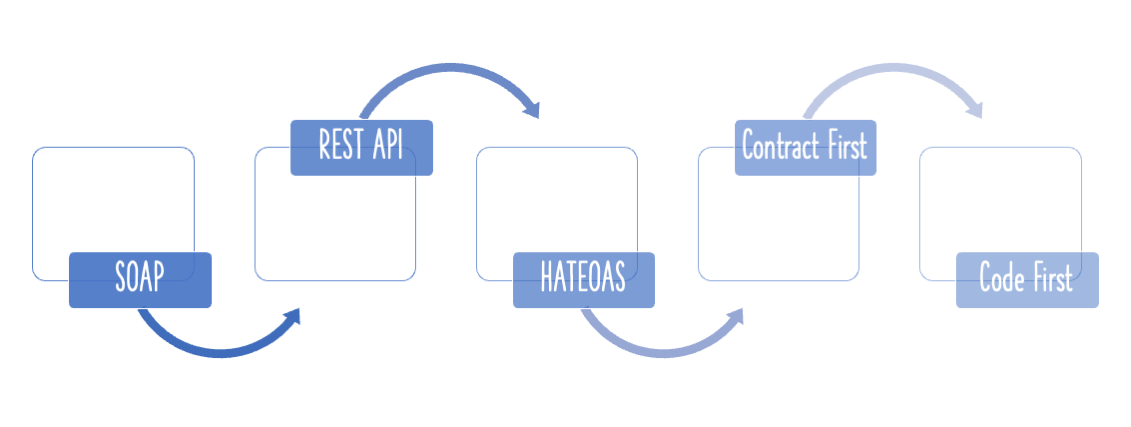
REST, unlike SOAP (WSDL), does not establish a documentation standard or contract. REST allows you to select your documentation format and strategy. However, this does not imply that “no documentation” exists.
It is a common misperception that REST implies no documentation. Your API must be documented.
How do you document your RESTful API?
One alternative is to manually maintain documentation. But that rapidly becomes obsolete.
An alternative is to produce documentation from code. That is the strategy we will use in this tutorial.
There are multiple approaches to documenting your RESTful API
- WADL
- RESTDocs
- Swagger or OpenDocs
Swagger has gained traction in recent years and is now the most widely used REST API description standard. This guide will make use of Swagger.
Bootstrapping a Project with a REST Resource
We set up a basic restful service with a resource exposing CRUD methods in the previous post in the series - http://www.springboottutorial.com/spring-boot-crud-rest-service-with-jpa-hibernate.
We will use the same example to generate Swagger Documentation.
Spring Boot Documentation Generation for Swaggger
To produce Swagger documentation, we would need to add a few Swagger-related dependencies and establish a Docket. We will also utilise Swagger UI to visualise the documentation and to conduct Test Requests.
Adding Swagger Dependencies
Let’s add a couple of dependencies to our Swagger Project pom.xml.
    <dependency>
      <groupId>io.springfox</groupId>
      <artifactId>springfox-boot-starter</artifactId>
      <version>3.0.5</version>
    </dependency>
Because we’re utilising a SNAPSHOT version, you’ll need to include a jfrog-snapshots repository in your pom.xml.
<repository>
      <id>jfrog-snapshots</id>
      <name>JFROG Snapshots</name>
      <url>http://oss.jfrog.org/artifactory/oss-snapshot-local</url>
      <snapshots>
        <enabled>true</enabled>
      </snapshots>
</repository>
Docket for Swagger Spring Configuration
Add the Spring setup required to produce Swagger documentation today.
/src/main/java/com/in28minutes/springboot/rest/example/swagger/OpenApiConfig.java
@Configuration
public class OpenApiConfig {

    @Bean
    public OpenAPI awesomeAPI() {
        return new OpenAPI()
                .info(new Info().title("Awesome API Title")
                        .description("Awesome API Description")
                        .version("1.0")
                        .license(new License().name("Apache 2.0").url("http://www.apache.org/licenses/LICENSE-2.0")))
                .externalDocs(new ExternalDocumentation()
                        .description("Ranga Karanam, [email protected]")
                        .url("http://www.in28minutes.com"));
    }

}
Notes
@Configuration- This file contains Spring configuration.
Exposing meta API information using @SwaggerDefinition
Swagger documentation generated
When you restart the program, you will be able to see the created documentation.
Go to URL http://localhost:8080/v2/api-docs
At the top of the documentation is the Meta Information of the API
{
  "swagger": "2.0",
  "info": {
    "description": "Awesome API Description",
    "version": "1.0",
    "title": "Awesome API Title",
    "termsOfService": "urn:tos",
    "contact": {
      "name": "Ranga Karanam",
      "url": "http://www.in28minutes.com",
      "email": "[email protected]"
    },
    "license": {
      "name": "Apache 2.0",
      "url": "http://www.apache.org/licenses/LICENSE-2.0"
    }
  },
  "host": "localhost:8080",
  "basePath": "/",
  "tags": [
    {
      "name": "web-mvc-endpoint-handler-mapping",
      "description": "Web Mvc Endpoint Handler Mapping"
    },
    {
      "name": "student-resource",
      "description": "Student Resource"
    },
    {
      "name": "operation-handler",
      "description": "Operation Handler"
    },
    {
      "name": "basic-error-controller",
      "description": "Basic Error Controller"
    }
  ],
  "consumes": [
    "application/xml",
    "application/json"
  ],
  "produces": [
    "application/xml",
    "application/json"
  ],
The paths contain the details of the resources being exposed
- You can see the different request methods, a summary of each method and all details about each request and response
  "paths": {
    "/students": {
      "get": {
        "tags": [
          "student-resource"
        ],
        "summary": "retrieveAllStudents",
        "operationId": "retrieveAllStudentsUsingGET",
        "consumes": [
          "application/xml",
          "application/json"
        ],
        "produces": [
          "application/xml",
          "application/json"
        ],
        "responses": {
          "200": {
            "description": "OK",
            "schema": {
              "type": "array",
              "items": {
                "$ref": "#/definitions/Student"
              }
            }
          },
          "401": {
            "description": "Unauthorized"
          },
          "403": {
            "description": "Forbidden"
          },
          "404": {
            "description": "Not Found"
          }
        }
      },
      "post": {
        "tags": [
          "student-resource"
        ],
        "summary": "createStudent",
        "operationId": "createStudentUsingPOST",
        "consumes": [
          "application/xml",
          "application/json"
        ],
        "produces": [
          "application/xml",
          "application/json"
        ],
        "parameters": [
          {
            "in": "body",
            "name": "student",
            "description": "student",
            "required": true,
            "schema": {
              "$ref": "#/definitions/Student"
            }
          }
        ],
        "responses": {
          "200": {
            "description": "OK",
            "schema": {
              "type": "object"
            }
          },
          "201": {
            "description": "Created"
          },
          "401": {
            "description": "Unauthorized"
          },
          "403": {
            "description": "Forbidden"
          },
          "404": {
            "description": "Not Found"
          }
        }
      }
    },
    "/students/{id}": {
      "get": {
        "tags": [
          "student-resource"
        ],
        "summary": "Find student by id",
        "description": "Also returns a link to retrieve all students with rel - all-students",
        "operationId": "retrieveStudentUsingGET",
        "consumes": [
          "application/xml",
          "application/json"
        ],
        "produces": [
          "application/xml",
          "application/json"
        ],
        "parameters": [
          {
            "name": "id",
            "in": "path",
            "description": "id",
            "required": true,
            "type": "integer",
            "format": "int64"
          }
        ],
        "responses": {
          "200": {
            "description": "OK",
            "schema": {
              "$ref": "#/definitions/Resource«Student»"
            }
          },
          "401": {
            "description": "Unauthorized"
          },
          "403": {
            "description": "Forbidden"
          },
          "404": {
            "description": "Not Found"
          }
        }
      },
      "put": {
        "tags": [
          "student-resource"
        ],
        "summary": "updateStudent",
        "operationId": "updateStudentUsingPUT",
        "consumes": [
          "application/xml",
          "application/json"
        ],
        "produces": [
          "application/xml",
          "application/json"
        ],
        "parameters": [
          {
            "in": "body",
            "name": "student",
            "description": "student",
            "required": true,
            "schema": {
              "$ref": "#/definitions/Student"
            }
          },
          {
            "name": "id",
            "in": "path",
            "description": "id",
            "required": true,
            "type": "integer",
            "format": "int64"
          }
        ],
        "responses": {
          "200": {
            "description": "OK",
            "schema": {
              "type": "object"
            }
          },
          "201": {
            "description": "Created"
          },
          "401": {
            "description": "Unauthorized"
          },
          "403": {
            "description": "Forbidden"
          },
          "404": {
            "description": "Not Found"
          }
        }
      },
      "delete": {
        "tags": [
          "student-resource"
        ],
        "summary": "deleteStudent",
        "operationId": "deleteStudentUsingDELETE",
        "consumes": [
          "application/xml",
          "application/json"
        ],
        "produces": [
          "application/xml",
          "application/json"
        ],
        "parameters": [
          {
            "name": "id",
            "in": "path",
            "description": "id",
            "required": true,
            "type": "integer",
            "format": "int64"
          }
        ],
        "responses": {
          "200": {
            "description": "OK"
          },
          "204": {
            "description": "No Content"
          },
          "401": {
            "description": "Unauthorized"
          },
          "403": {
            "description": "Forbidden"
          }
        }
      }
    }
  },
Definitions contain the detailed structure of the elements used in Request and Responses above.
  "definitions": {
    "Resource«Student»": {
      "type": "object",
      "properties": {
        "id": {
          "type": "integer",
          "format": "int64"
        },
        "links": {
          "type": "array",
          "items": {
            "$ref": "#/definitions/Link"
          }
        },
        "name": {
          "type": "string",
          "description": "Name should have atleast 2 characters"
        },
        "passportNumber": {
          "type": "string"
        }
      }
    },
    "Map«string,Link»": {
      "type": "object",
      "additionalProperties": {
        "$ref": "#/definitions/Link"
      }
    },
    "Student": {
      "type": "object",
      "properties": {
        "id": {
          "type": "integer",
          "format": "int64"
        },
        "name": {
          "type": "string",
          "description": "Name should have atleast 2 characters"
        },
        "passportNumber": {
          "type": "string"
        }
      },
      "description": "All details about the student. "
    },
    "Link": {
      "type": "object",
      "properties": {
        "href": {
          "type": "string"
        },
        "templated": {
          "type": "boolean"
        }
      }
    }
  }
}
Launching Swagger UI
You can also use the Swagger UI available at http://localhost:8080/swagger-ui/index.html.
Older url was http://localhost:8080/swagger-ui.html
Below screenshot shows the Home Page of Swagger UI. It shows a list of all the resources that are exposed.
Choosing the Student resource takes you to details of the resource. It shows all the request methods that can be used with a Resource.

You can also see the details for a Specific Request Method.

You can use the ‘Try it out’ button to execute a request and see the response.

Customizing Swagger Documentation with Annotations
You can add notes on the resource method to add more documentation
  	@GetMapping("/students/{id}")
	@Operation(summary = "Find student by id, also returns a link to retrieve all students with rel - all-students")
	public EntityModel<Student> retrieveStudent(@PathVariable long id) {
Also supported is enhancing the documentation on the Request and Response Beans.
@Entity
@Schema(description = "All details about the student. ")
public class Student {
    @Id
    @GeneratedValue
    private Long id;

    @Schema(name = "Name should have atleast 2 characters")
    @Size(min = 2, message = "Name should have atleast 2 characters")
    private String name;
Maven Project Completion using Code Examples
Our Github repository has all the code examples - https://github.com/in28minutes/spring-boot-examples/tree/master/spring-boot-2-rest-service-with-swagger
Just Released