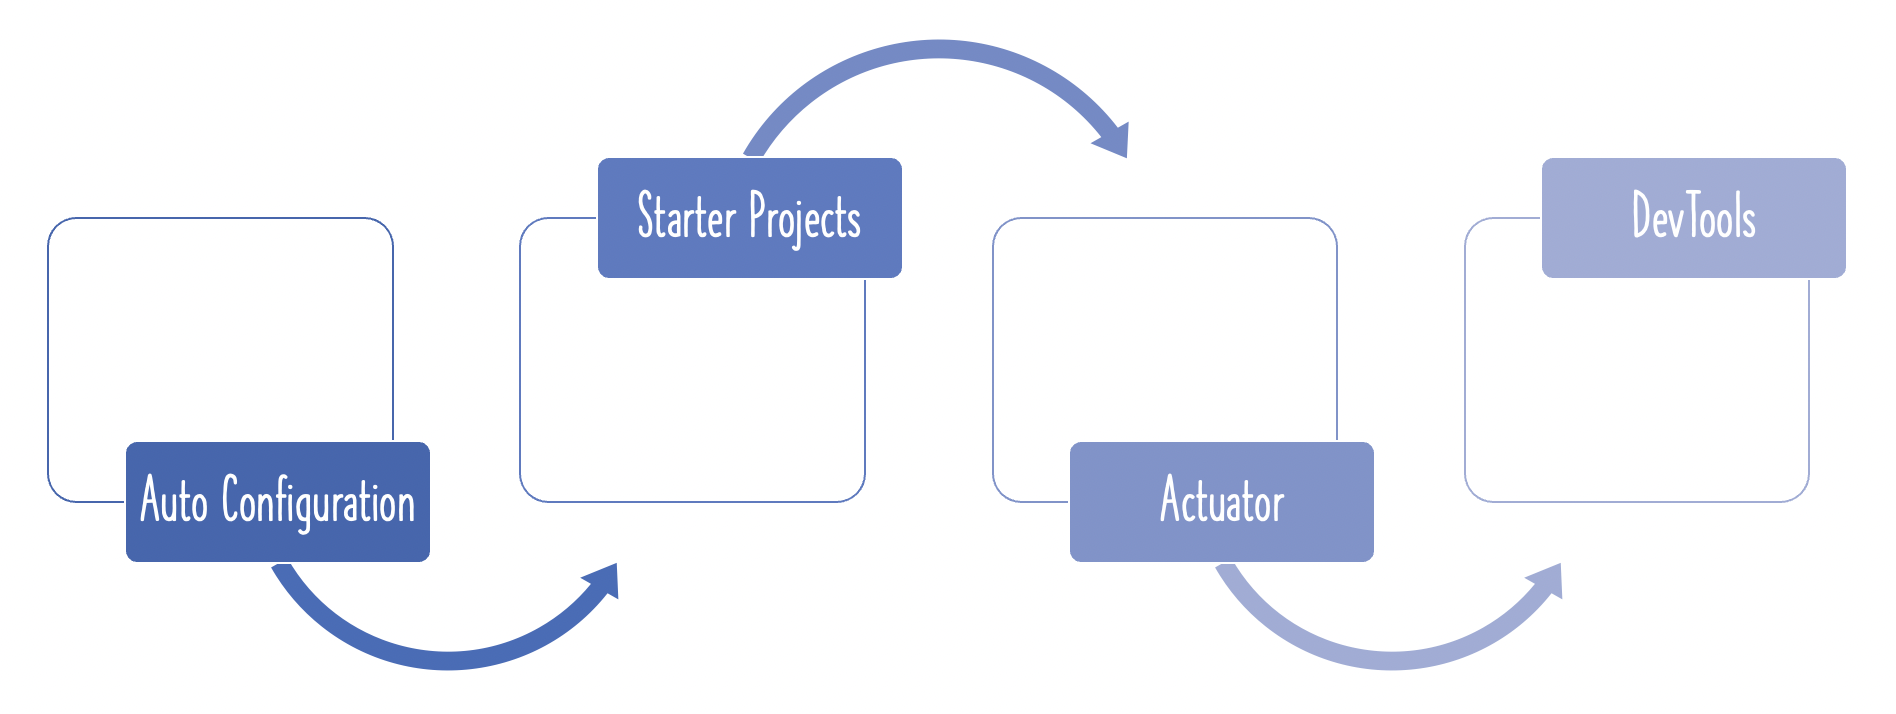

It is tough to define what Maven accomplishes.
Every day, Developer undertakes a variety of tasks.
- Manages Dependencies
- Web Layer (Spring MVC)
- Data Layer (JPA - Hibernate) etc..
- Build a jar or a war or an ear
- Run the application locally
- Tomcat or Jetty
- Deploy to a T environment
- Add new dependencies to a project
- Run Unit Tests
- Generate Projects
- Create Eclipse Workspace
All of this and more is made possible by Maven…
Getting Started
- Git Repository - https://github.com/in28minutes/getting-started-in-5-steps/tree/master/maven-in-5-steps
- Pre-requisites
- Java & Eclipse - https://www.youtube.com/playlist?list=PLBBog2r6uMCSmMVTW_QmDLyASBvovyAO3
- We will use embedded maven in Eclipse
Overview
- Step 1 : Creating and importing a Maven Project
- Step 2 : Understanding Project Object Model - pom.xml
- Step 3 : Maven Build Life Cycle
- Step 4 : How does Maven Work?
- Step 5 : Important Maven Commands
Step 1 : Creating and importing a Maven Project
Creating a Spring Project with Spring Initializr is a cake walk.
Spring Initializr http://start.spring.io/ is great tool to bootstrap your Spring Boot projects.

As shown in the image above, following steps have to be done
- Launch Spring Initializr and choose the following
- Choose
com.in28minutes.learning.mavenas Group - Choose
maven-in-few-stepsas Artifact - Choose Dependency
- Web
- Choose
- Click Generate Project.
- Import the project into Eclipse.
- If you want to understand all the files that are part of this project, you can go here.
Step 2 : Understanding the pom.xml Project Object Model
Naming a project
How can other projects benefit from our project? Using the groupId and artifactId from our project
	<groupId>com.in28minutes.learning.maven</groupId>
	<artifactId>maven-in-few-steps</artifactId>
Parent Pom
The same as Java Inheritance. We get a lot of things from our parents.
	<parent>
		<groupId>org.springframework.boot</groupId>
		<artifactId>spring-boot-starter-parent</artifactId>
		<version>3.0.4/version>
		<relativePath/> <!-- lookup parent from repository -->
	</parent>
Declaration of Dependencies
Dependencies are frameworks required to construct your project.
In the following example, we will add two dependencies.
<dependency>
	<groupId>org.springframework.boot</groupId>
	<artifactId>spring-boot-starter-web</artifactId>
</dependency>

<dependency>
	<groupId>org.springframework.boot</groupId>
	<artifactId>spring-boot-starter-test</artifactId>
	<scope>test</scope>
</dependency>
Step 3 : Life Cycle Maven Build
When we execute mvn clean install we finish the whole maven build life cycle.
LifeCycle construction is a series of phases.
- Validate
- Compile
- Test
- Package
- Integration Test
- Verify
- Install
- Deploy
Maven prefers convention to configuration.
Pre defined folder structure
- Source Code
- ${basedir}/src/main/java
- ${basedir}/src/main/resources
- Test Code
- ${basedir}/src/test
Step 4 : How does Maven Work?
All jars in the Maven Repository are indexed by artifactid and group id.
When we add a dependence to our pom.xml, maven queries the maven repository for jar dependencies, using the group id and artefact id as input.
- Maven repository stores all the versions of all dependencies. JUnit 4.2,4.3,4.4
The jar dependencies are saved on your system in the maven local repository folder. All of our projects would make use of the jars in the maven local repository.
Local Repository: a temporary folder on your workstation in which Maven keeps jar and dependent files obtained from the Maven Repository.
Step 5 : Important Maven Commands
mvn --versionmvn compile(compiles source files)mvn test-compile(compiles test files) - one thing to observe is this also compiles source filesmvn clean- deletes target directorymvn test- run unit testsmvn package- creates the jarhelp:effective-settingshelp:effective-pomdependency:treedependency:sources--debug
Just Released